Table of contents
Introduction
Android is one of the most popular Linux based operating systems. There are billions of application available at google play store which you can install on your android device. Due to the increase in the popularity and demand, developers have built android emulators (like BlueStacks, Memu) which allow us to run Android apps on our Windows or Mac computers.
Android is Linux based so there are many tweaks which you can make your device more powerful. All of these advanced tweaks require a rooted device so that the root app can tweak the internal files of your device.
There are many sites across the web from where you can easily learn ‘how to root an Android device’. Here in this guide, I am going to guide you for ‘how to root BlueStacks 2, 3, 4 Latest version with 2 different methods’.
KingRoot – How to root BlueStacks 2, 3, 4 using KingRoot
Kingroot is a very popular application which installs SU binary and root your device with just one click. It is the best alternative to Supersu apk because here you no need to be an advanced technical guy. Follow the below step by step guide;
Note:- You must have to enable internet connection otherwise Kingroot will not work on your device.
- First of all, download and install Kingroot apk (click here) on your BlueStacks emulator.
- Then launch or open the application.
- Now Kingroot will show you an error “root status error: Fix” or “Device is not Root yet” (Try new Root strategy). This means that your device is not rooted yet.
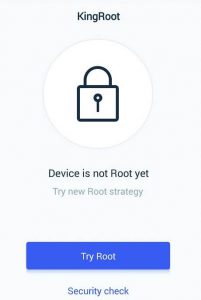
- Now, you need to click on the ‘Try Root‘. This will start the installation process of su binary in your BlueStacks.
- Wait until the process gets completed. This will take few seconds or some minutes.
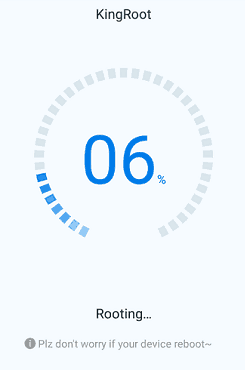
- Now reboot your emulator. That’s it.
Now your BlueStacks Emulator is successfully rooted. Kingroot is safest and the most popular method to root any Android device. But I have also introduced an alternative methods to root your emulator using BS Tweaker tool, which you can find in the below guide; Only use the BS Tweaker if the KingRoot tutorial not working for you.
BS Tweaker Tool – How to root BlueStacks 2, 3, 4 using BS Tweaker
BS tweaker tool is itself an advanced tool created for tweaking the BlueStacks emulator. With the help of BS tweaker, you can easily change the device id, GUID, and IMEI number of your device. You can also root your emulator without any error.
Step by step guide:
- The very first thing which you need to do is that download BS tweaker tool.
- Now launch the BS tweaker. You need to run BS tweaker tool as administrator.
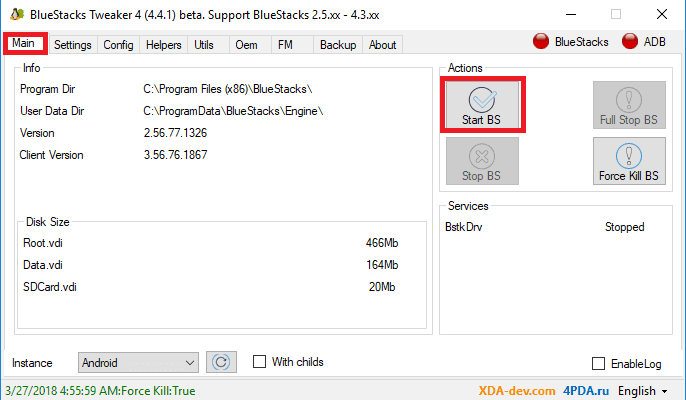
- In the dashboard of BS, you will have several tabs. You need to select the “Main” tab and then click on the “Force Kill BS“. see below picture

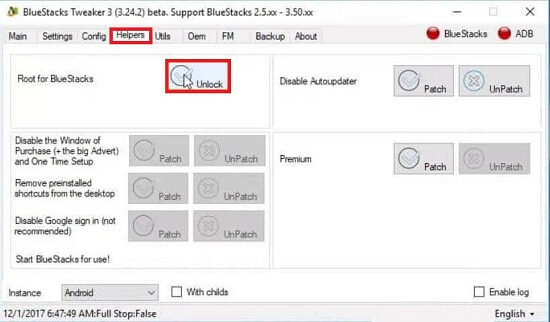
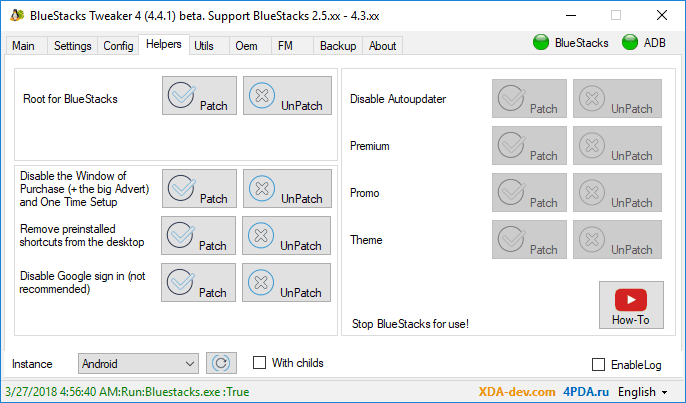
- And you need to wait until the BlueStacks and ADB indicators turn red. And then go to the “Helpers” tab. And there you need to click on “Unblock” (located near the “root for bluestacks option”). see below picture.
- Now you need to go back to “Main tab” and then click on “Start BS“. see below picture.
- Once the BlueStacks started. Then you need to go to the “Helper” tab and then click on “Patch“. see below picture
- That’s it. Now your emulator is rooted.
If your bluestacks is still not rooted by following the above method or you are unable to apply the above tutorial. Then I have a solution for you.
You can download the pre-rooted bluestacks. This is an offline installed that means you do not need to have internet connection for installing the emulator. Download free offline pre-rooted bluestacks
How to verify whether your BlueStacks rooted or not
There are several android apps at the Google play store for checking root access in your Android device. Follow the below guide:
- First of all, download root checker from play store.
- And then install the app in your bluestacks emulator.
- Now open the root checker app.
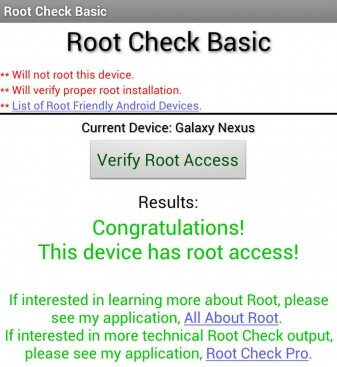
- And then tap on the “verify root access” button.
- And now, wait until the app checks for root access. If the root checker prompts you to grant root access permission. Then tap on “Grant” option.
- That’s it. You can see something like below screenshot.
If the root checker app does not prompt you for granting root permission that means your emulator is not rooted yet. I will recommend you to download offline pre-rooted BlueStacks (if you are not able to apply the root tutorial).
Thanks. I hope that the above step by step guide helped you to root your bluestacks android emulator. If you have any problem regarding the above tutorial, you can comment in the below comment box.
Looking for the best app to watch free movies on your Android phone? Then your should check Showbox app. This is the most famous app today that has a big library of shows and movies. This app is also available for iMac users. But your need to download it first to enjoy free shows.
Thanks to sharjng with us .
You can also download bluestack rooted version offline setup from here.
Thans
Thanks for the wonderful tutorial.
Please make a tutorial for “how to install rooted BlueStacks on MacOS (Linux)”.
Wow!!! bs tweaker worked but not kingroot