
Android and Windows OS are the most popular operating system in the world which provides a lot of flexibility and customization that you can’t get in any other OS.
Android is a Linux based operating system which not only provides you the flexibility of automation and other advanced security functions. It also provides you the power to install other OS such as Kali Linux, BackTrack, Windows 10 OS, MacOS. All of these advanced functionality works only in a rooted device. And we know that rooting an android device void the warranty of our device.
Installing an Operating system requires that your device must be rooted or you must have to unlock the bootloader and you must have the Windows 10 ROM. And then you need to flash your device with the custom ROM and after that, you can use the Win10 OS on your Android device.
If you do not want to root your device then no worry. In this tutorial, I will show you, ‘how you can easily install Windows 10 OS in your Android device without root using Limbo PC emulator.’
How to Install Windows 10 on Android using Limbo Emulator
Required files:
1. Download Windows 10 img file and keep it in your Micro SD card. click here
2. And then download and install Limbo PC emulator.
Follow the below tutorial:
Note: I assume that you have already downloaded the required files from the above links.
1. Install the Limbo pc emulator in your android device (either tablet or mobile) and open the app.
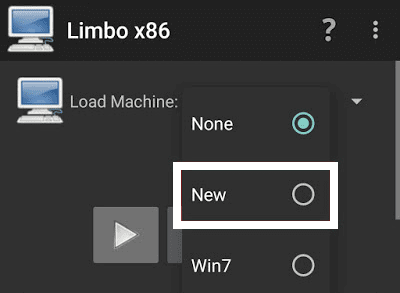
2. At your Limbo dashboard, You will have a dropdown menu for load machine. You need to tap the dropdown menu and then select “New.” see below picture.
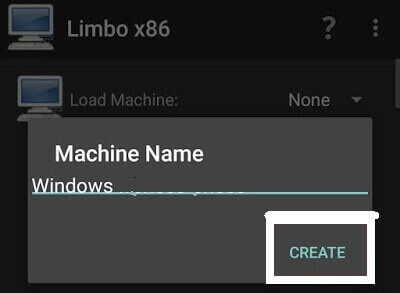
3. Now, a pop-up window will appear. You need to enter the name of the your new virtual machine and then click on ‘Create‘. see below picture
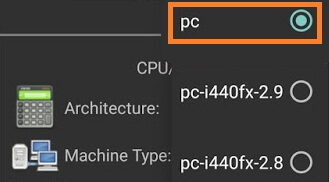
4. Architecture option: Here you need to select PC.
5. Machine Type option: Here you need to select x64 option.
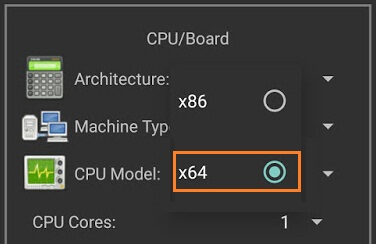
6. CPU Model option: Here you need to select SandyBridge option.
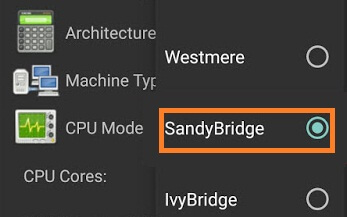
7. CPU cores option: Here you need to select 4 Cores.
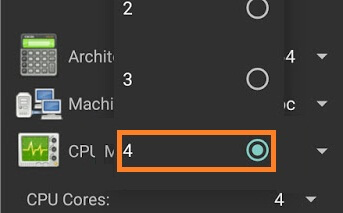
8. RAM memory option: Here you need to select 880 mb RAM. You can select more RAM if your device has more than enough RAM.
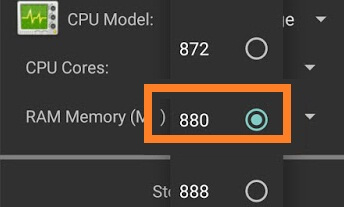
9. Hard disk option: Here you need to select the “OPEN” option. After that, you will be redirected to your SD card. Now you need to locate the downloaded windows 10 ISO file and then select the file.

10. Device option: Here you need to select Hard Disk in the boot settings.
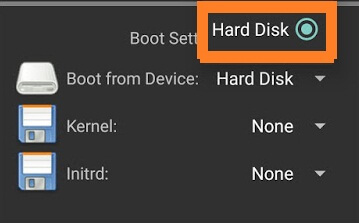
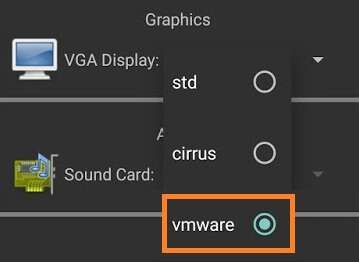
11. VGA Display option: Here you need to select Vmware.
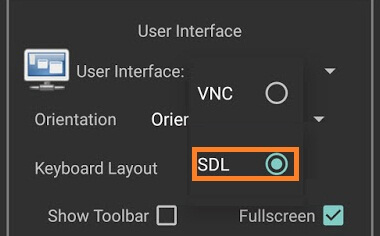
12. User Interface option: Here you need to select SDL.
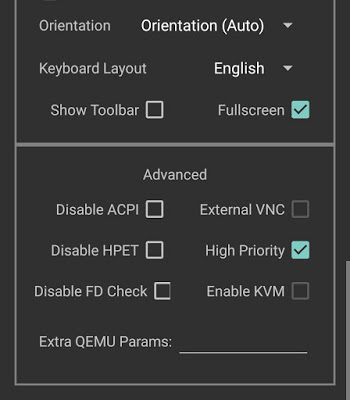
13. Now you need to match all the settings as shown in the below picture one by one.
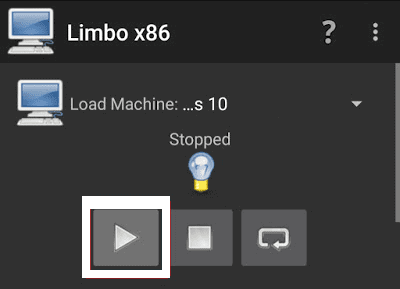
14. Now you need to click on Play Option. It will start booting process of windows 10.
15. While booting being in process. You device screen will look something like below picture.
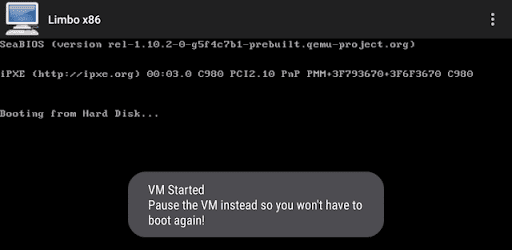
16. When the booting process will be 100% completed. Your Windows 10 home screen will look something like below picture.
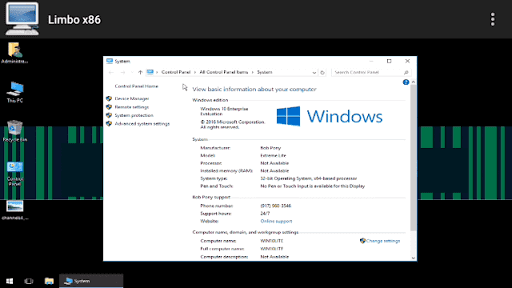
17. That’s it.
I hope that the above step by step guide has helped you for installing Windows 10 on your android device (tablet or mobile) without root using limbo emulator.
Please add img files
from Windows XP 2017
Professional 10 Edition
for limbo pc emulator.
I’ve entered the above settings and run this, on my Samsung S8, using the .qcow file downloaded from your linked site. The emulator seems to start (and keep running) but after the line with Booting from Hard Disk … , the screen goes black (apart from white band at the bottom with the normal Android buttons) and nothing else happens.
Do you have any ideas/suggestions, please?
met ta ram mois grande avant le demarage car g pareil
I’ve entered the above settings and run this, on my Asus M1, using the .qcow file downloaded from your linked site. The emulator seems to start (and keep running) but after the line with Booting from Hard Disk … , the screen goes black (apart from white band at the bottom with the normal Android buttons) and nothing else happens.
Do you have any ideas/suggestions, please?
Limbo
On a non-rooted device it seems the image doesn’t work, launches and sits on a black screen with minimal errors in the log to suggest anything wrong.
Hiii i need window 10
hi its post very interesting
Thanks worked like a charm. I had to enter settings for my My screen resolution with VNC and worked. Although buggy on stockrom. Am rooted.
Thanks Winc0m. I glad that this guide has helped you.
Dosent work on android 5.0.2, crashes on vm startup or shows no bootable debice..
Black screen after hard disk boot on non-rooted S9+
It works but it is so slow for me, that it has no use for me, can it be fixed?
Samsung note 9
It hangs on the Windows logo.
Download Windows 10
Hello! Thanks for this tutorial. You mentioned:
“Installing an Operating system requires that your device must be rooted or you must have to unlock the bootloader and you must have the Windows 10 ROM. And then you need to flash your device with the custom ROM and after that, you can use the Win10 OS on your Android device.”
Do you have a tutorial for this also?
All windows softwares can be run in my phone
Hey, my app keeps crashing every time I try this with the same settings? Why is this?
Nice
Wow nice
My screen will jump to the homepage
I went through this step by step but says theres no bootable device